Query Data Set Chatbot Step
The Query Data Set chatbot step is a powerful tool that allows you to perform queries against an uploaded data set from a chatbot execution.
The results of a Query Data Set step are stored in a chat attribute that is either a single data set record or a list of records, that can be referenced later in the chatbot flow.
Anatomy of a Query Data Set Step
There are five main parts of a Query Data Set step.
- Data Set Selection
- Conditions Specification
- Column Selection
- Single/Multi-Row Selection
- Results Chat Attribute Selection
We'll go through these parts one-by-one.
SQL query similaritiesIf you have experience writing SQL queries, you can think of a Data Set Query step in relation to a typical SQL query. Each part of the Data Set Query step has a SQL query analog.
Data Set Selection => SQL FROM clause
Conditions => SQL WHERE clause
Column Selection => SQL SELECT clause
Single/Multi-Row Selection => SQL TAKE 1 vs take all
Results Chat Attribute => SQL "Save results to..."
Let's drop the Query Data Set step on a chat bot flow and get started!

Query Data Set Step
Data Set Selection
The first part of configuring a Query Data Set step is selecting the data set to query.
Before you can do this though, you must first have a data set uploaded that you'd like to query. Refer to the Data Sets Overview for details on uploading your data set.
For this guide, we'll query a data set called FacilityLocations, that contains ZipCode, FacilityName, and FacilityType.
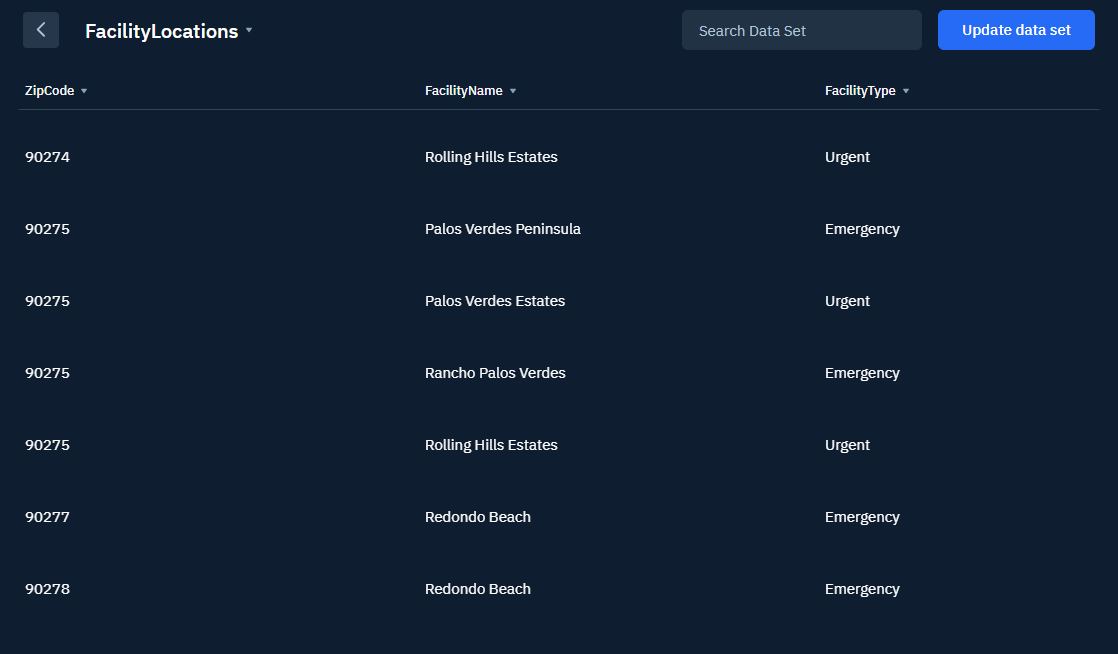
FacilityLocations Data Set
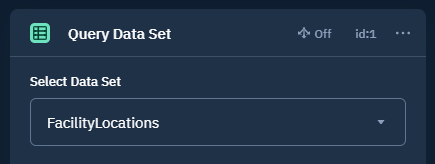
Query Data Set Step with Data Set Selected
Conditions Specification
Next we'll configure the query conditions. The query conditions support one or more simple conditions, combined together with "and"/"or" logic.
Each record in the data set will be evaluated against the query conditions and be a part of the result set if it satisfies the condition.
For this example, we want to find any emergency facilities in the 90275 zip code. This means we'll add two conditions:
- ZipCode equals "90275", AND
- FacilityType equals "Emergency"
Start configuring the conditions by clicking "Add condition" to add the first condition.
Conditions Config Prior to Adding Any Conditions
In the add condition pop-up, select the data set column to evaluate, the condition operator, and the value to compare it to. For our example, we select the ZipCode column, the "equals" operator, and the value "90275".
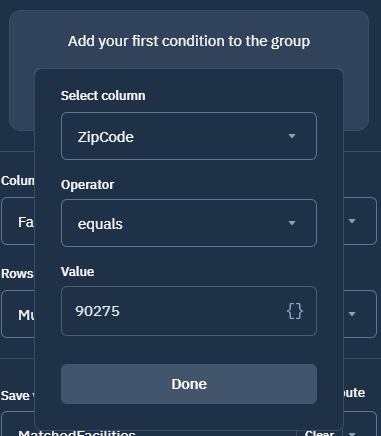
Condition Filtering for Records Where the ZipCode Equals "90275"
Data set conditions treat values as stringsNote that values in a data set are stored and treated as strings, so all conditions are evaluated as string comparisons.
This means that only string operators are available, and if you're comparing numbers or dates in a condition, you must ensure that the format of your data set values match the format of the comparison value. For example, if dates are stored as "01/15/2022" in the data set, the comparison value should also be in the "MM/dd/yyyy" format.
The newly added condition will display in the conditions section of the Query Data Set step.
Since we want to return records where both of our conditions apply, we want to change the dropdown to the right of the condition from "Or" to "And".
To add the second condition, click "Add Condition".
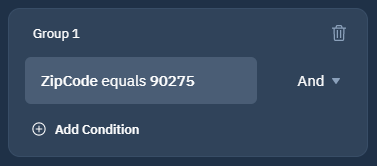
Conditions Config After Adding First Condition
In the add condition pop-up, we select the FacilityType column, the "equals" operator, and the value "Emergency".
Once both conditions are added, the conditions section of the Query Data Set step shows both conditions and indicates that they will be combined with an "And".
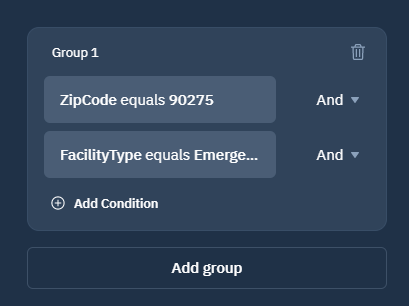
Conditions Config After Adding Both Conditions
Condition values can reference chat attributesThe value used in a condition does not have to be a string literal. It could be a chat attribute reference to an attribute set earlier in the chatbot flow.
Grouping Conditions
For more complex queries, you may need to combine groups of conditions to achieve the desired result. A group effectively puts parentheses around the conditions contained in that group, so that the group is evaluated first before the result is combined with the other condition group(s) in the query.
Grouping allows you to combine conditions with both "and" and "or" and specify the order of evaluation. MedChat supports up to two levels of condition grouping.
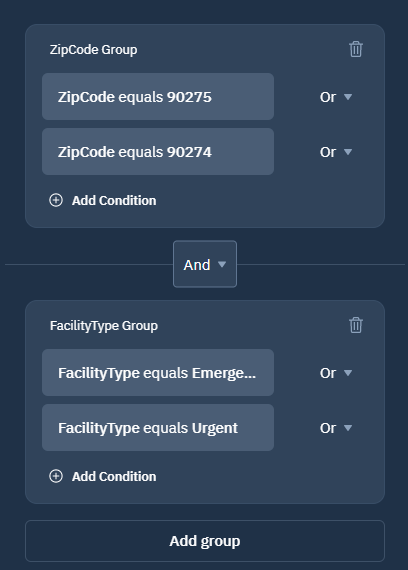
Grouped Conditions
The condition set in the image above could be written as follows:
((ZipCode equals "90275") OR (ZipCode equals "90274"))
AND
((FacilityType equals "Emergency") OR (FacilityType equals "Urgent"))
Column Selection
Use the columns selector to select the columns from the matched rows in the data set that you'd like to be on your results chat attribute.
The columns that you select will depend on your requirements and how you intend to use the results of the query.
The columns selector allows you to select any column(s) from selected data set.
For our example, I've selected the FacilityName and FacilityType columns.
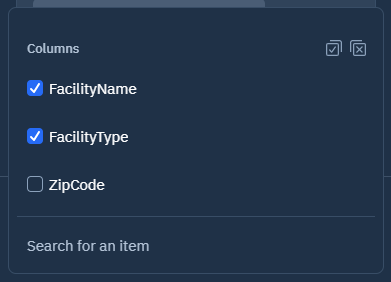
Columns Selector
Single/Multi-Row Selection
Use the rows selector to indicate whether you'd like a single row returned or multiple rows.
Perhaps you are only interested in the first match from a query or you just want to know whether a record exists? Then you'd want to select "Single Row."
Or maybe you want all of the matches from a query that you can display to the user, fill a multi-choice or dropdown input, or use for further processing later in your chatbot? Then you'd want to select "Multiple Rows."
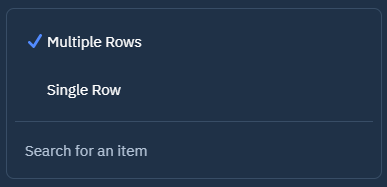
Rows Selector
Whether you select "Single Row" or "Multiple Rows" will impact what type of chat attribute you're able to save the query results to in the next step.
A single row of results must be saved to a Data Set Record chat attribute.Multiple rows of results must be saved to a List of Records chat attribute.
Results Chat Attribute Selection
The last part of configuring the Query Data Set step is specifying where to store the results.
You'll specify the chat attribute to hold the query result(s) that can be referenced later in the chatbot flow. You can select a chat attribute that has already been created (as long as it is the correct type) or create a new attribute from the Query Data Set config by clicking "New Attribute":

Custom Attribute Selector
Upon clicking "New Attribute", you'll be prompted to give your attribute a name and select the data type. Since I selected "Multiple Rows" in the prior step, I've named my attribute "MatchedFacilities" and selected "List of Records" for my data type.
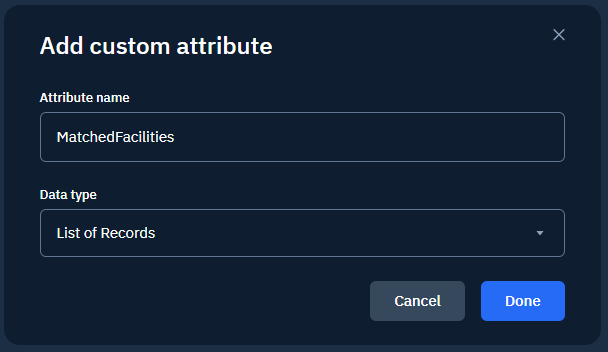
Add a List of Records Custom Attribute
If I'd selected "Single Row" in the prior step, I'd name my attribute "MatchedFacility" and select "Data Set Record" for my data type.
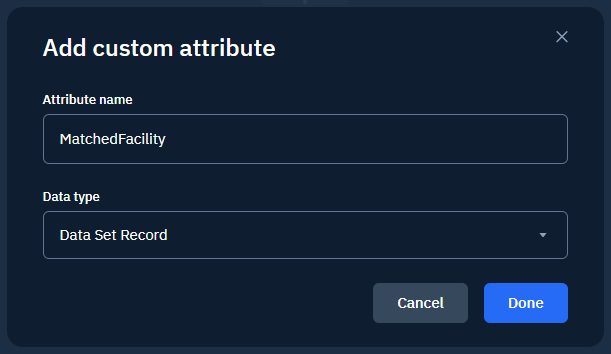
Add a Data Set Record Custom Attribute
Practice precise attribute namingIt's helpful to choose chat attribute names that are descriptive and accurate. From the names in the screenshots above it's clear that we expect these attributes to contain multiple facilities that were matched by our query or one facility that was matched by our query, respectively.
Consistent and precise naming is helpful later on in your chatbot flow when referencing chat attributes. Whether it's singular or plural is a queue to you the bot builder that indicates whether the attribute holds a single record or multiple records.
Wrapping Up
Our Query Data Set step configuration is now complete! The completed step looks like this:
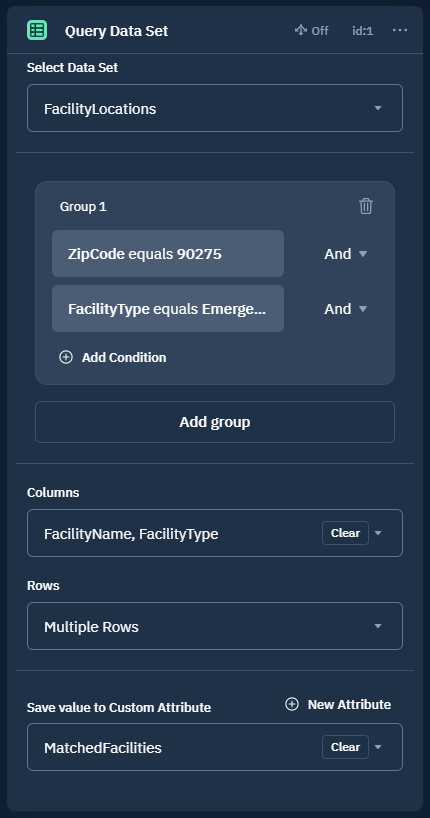
Completed Query Data Set Step Configuration
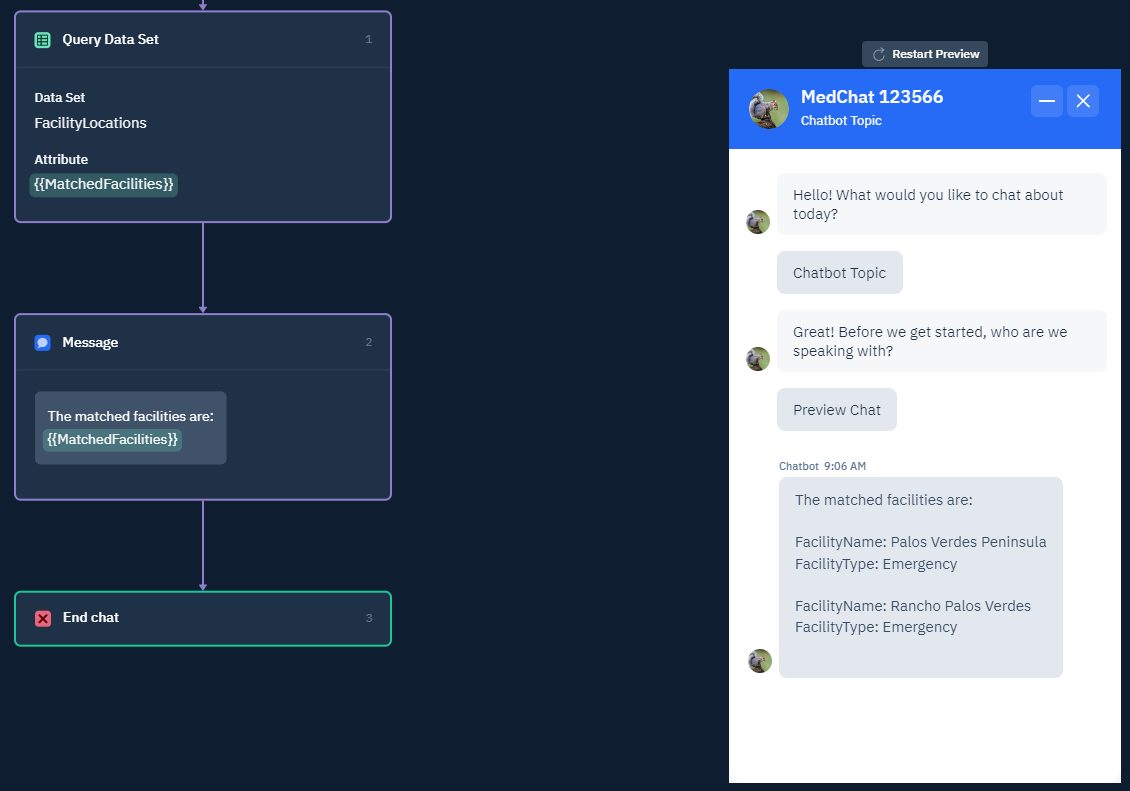
To test my configuration, I place a Message block right after the Query Data Set step and output the value of the "MatchedFacilities" chat attribute.
Since "MatchedFacilities" is a List of Records, when the chat attribute is rendered in the message it prints out the column values that we selected in the Query Data Set step for each of the two facilities that matched our criteria:
Updated 5 months ago
